
How to Take Cornell Notes Digitally: Step-by-Step Guide (2026)
Quick Answer:
Taking Cornell notes digitally involves three steps:
- (1) Set up your digital template with 30% cue column, 70% notes column, and summary section in your chosen app.
- (2) Take notes in the main column during lectures using your device.
- (3) Review within 24 hours to add cue questions and summaries.
Digital Cornell notes offer advantages like searchability, cloud sync, multimedia integration, and easier reorganization compared to paper notes.
Key Takeaways
- Three-Step Process: Set up a digital template, take notes during lectures, then review within 24 hours to add cues and summaries
- Platform Flexibility: Works in Notion, OneNote, GoodNotes, Google Docs, and specialized tools like KenzNote
- Searchability Advantage: Digital notes are instantly searchable across all subjects and semesters
- Cloud Sync: Access your notes from any device — laptop, tablet, or phone
- Multimedia Integration: Embed videos, audio recordings, images, and links directly in your notes
- Template Reuse: Set up once and reuse your Cornell template for every lecture or meeting
- AI-Powered Option: Tools like KenzNote can automatically generate Cornell-formatted notes from audio recordings
Why Digital Cornell Notes?
The Cornell note-taking system, developed at Cornell University, is one of the most research-backed study methods available. Recent studies show it enhances reading comprehension and reduces cognitive load for students. Taking it digital amplifies these benefits with technology.
Advantages Over Paper
Organization & Access:
- Search across all notes instantly
- Access from any device with cloud sync
- Never lose notes to spills or misplacement
- Easily reorganize and tag notes
Enhanced Learning:
- Embed videos, audio, and images directly
- Link related notes together
- Copy/paste important resources
- Quick formatting and editing
Sustainability:
- Zero paper waste
- Lower long-term costs
- Backup and archive indefinitely
- Share with classmates instantly
Efficiency:
- Type faster than handwriting
- Copy text from slides or documents
- Use voice dictation for quick capture
- Templates save setup time
Potential Challenges
Distractions:
- Other apps and notifications
- Internet access temptation
- Requires discipline
Learning Curve:
- Initial setup time
- App-specific features to learn
- Different from paper feel — a 2024 Frontiers in Psychology study found that handwriting activates broader brain connectivity patterns than typing, which may benefit memory formation
Technical Issues:
- Device battery life
- Software crashes or bugs
- Internet connectivity for some apps
Solutions: Turn off notifications during lectures, download offline templates, keep charger handy, and master one app thoroughly before switching.
Platform-Specific Tutorials
Tutorial 1: Cornell Notes in Notion
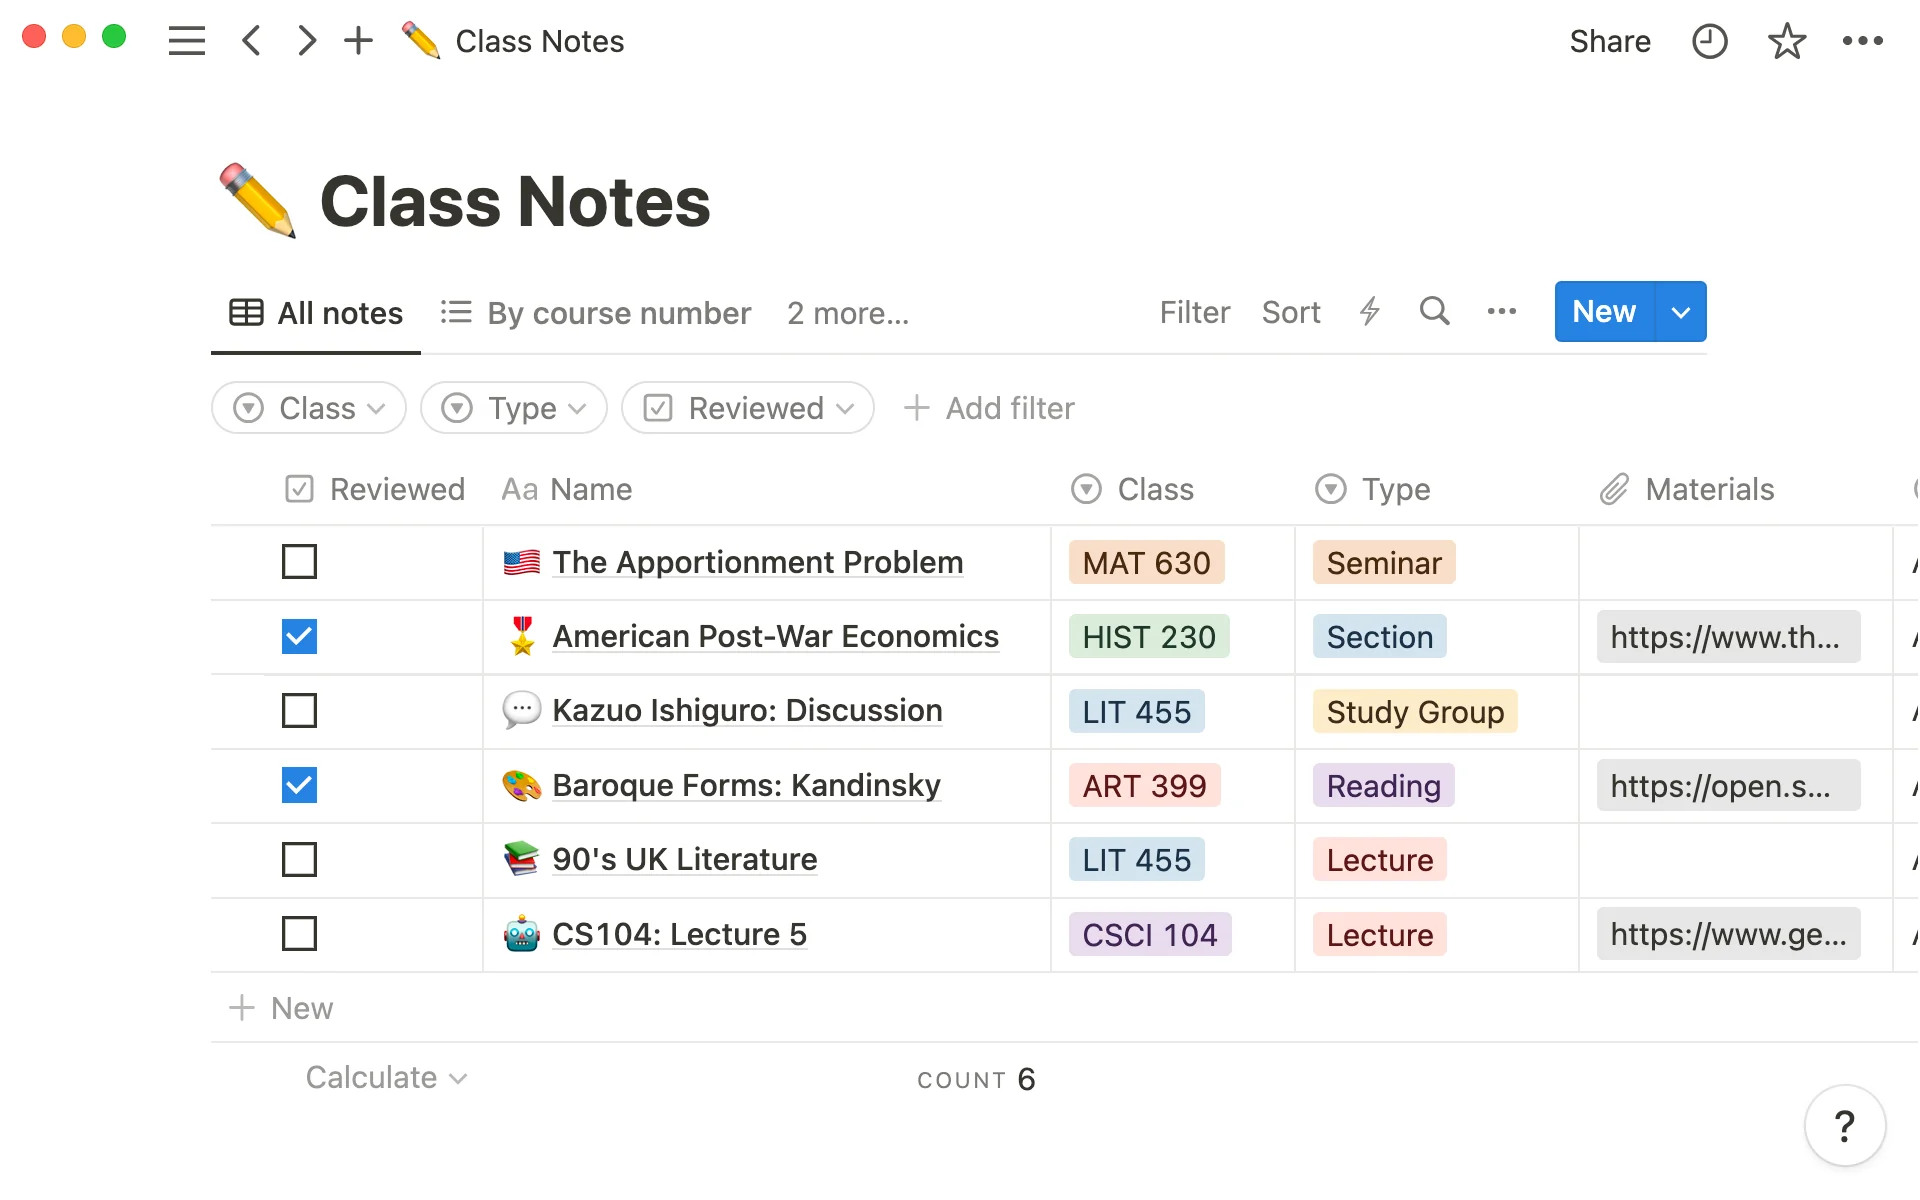
Difficulty: Intermediate Time to Setup: 15 minutes Best For: Students who want maximum flexibility and organization
Step 1: Create Your Template Database
- Open Notion and create a new page
- Type
/databaseand select "Table - Inline" - Name it: "Cornell Notes"
- Add properties:
- Subject (Select)
- Date (Date)
- Tags (Multi-select)
- Status (Select: Not Reviewed, Reviewed, Mastered)
- Course (Relation - optional)
Step 2: Create the Cornell Template
-
Click "New" to create your first note
-
Add page icon and cover (optional but helpful)
-
Add header section:
📚 Subject: [Property] 📅 Date: [Property] 🏷️ Tags: [Property] -
Create two-column layout:
- Type
/columnand select "2 columns" - Click the divider and drag to adjust ratio (30/70)
- Type
-
Set up Cue Column (left, 30%):
- Add heading: "## Cue Column"
- Add several toggle list items (
/toggle) - Each toggle will hide/reveal answers for self-testing
-
Set up Notes Column (right, 70%):
- Add heading: "## Notes"
- Add blank lines for content
- Optionally add headings for major topics
-
Add Summary Section:
- Below the columns, add callout block (
/callout) - Choose info icon and blue color
- Add heading: "### Summary"
- Leave space for summary text
- Below the columns, add callout block (
Step 3: Save as Template
- Click ••• menu at top right of the database
- Select "New Template"
- Name it: "Cornell Note Template"
- Click "Save"
Step 4: Taking Notes in Notion
During Lecture:
- Click "New" in your database
- Select your Cornell template
- Fill in Subject, Date, Tags
- Type directly in Notes Column (right side)
- Use keyboard shortcuts:
Cmd/Ctrl + Efor inline codeCmd/Ctrl + Shift + Mfor comment/for quick block insertion
After Lecture (within 24 hours):
- Open your note
- Add cue questions in left column:
- Create toggle list items
- Write question as the toggle header
- Optional: Put answer inside toggle for self-testing
- Write summary in callout box
- Update Status property to "Reviewed"
Advanced Notion Tips
Linked Databases:
- Create filtered views by subject
- Sort by date or status
- Track review schedule
Templates for Different Subjects:
- Create specialized templates (Math with equation blocks, etc.)
- Save multiple templates in the same database
Integration:
- Embed YouTube lecture videos
- Link to assignment pages
- Connect to calendar for review scheduling
Keyboard Shortcuts:
Cmd/Ctrl + P: Quick search/command menuCmd/Ctrl + Shift + L: Toggle dark modeCmd/Ctrl + [: Go backCmd/Ctrl + ]: Go forward
Tutorial 2: Cornell Notes in OneNote
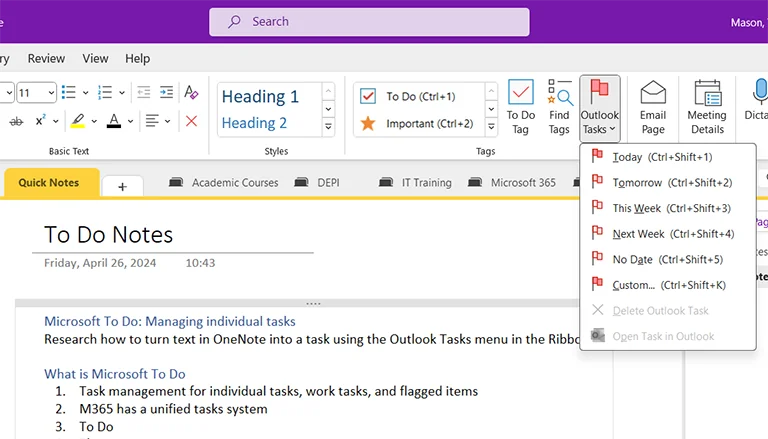
Difficulty: Beginner Time to Setup: 10 minutes Best For: All users, especially those with stylus/pen input
Step 1: Set Up Your Notebook Structure
- Open OneNote
- Create new notebook: "Cornell Notes"
- Create sections for each class/subject
- Within each section, create pages for individual lectures
Step 2: Create Cornell Template (Table Method)
- Create new page in your section
- Insert → Table → 2x2 table
- Adjust the table:
- Click and drag column border to 30/70 ratio
- Select right column cells → Right-click → Merge Cells
- Select bottom row cells → Right-click → Merge Cells
- Add labels:
- Top left cell: "Cue Questions"
- Top right cell: "Notes"
- Bottom cell: "Summary"
Step 3: Save as Template
- Right-click the page in the page list
- Select "Set as Default Template" for this section
- For future notes, new pages will use this format
Alternative: Free-Form Method (Better for Handwriting)
- View → Rule Lines → Show rule lines
- Draw vertical line at 30% mark with pen tool
- Draw horizontal line near bottom
- Add text boxes for "Cue", "Notes", "Summary"
- This method allows writing anywhere on the page
Step 4: Taking Notes in OneNote
During Lecture (Typing):
- Click in the Notes section (right side)
- Type your notes directly
- Use Ctrl + 1 for important items (star marking)
- Use Alt + Shift + D to insert date/time stamp
During Lecture (Handwriting with Stylus):
- Select pen from Draw tab
- Write directly in Notes column
- Use different colors for emphasis
- Draw diagrams and equations naturally
After Lecture:
- Add cue questions in left column
- If handwriting: write questions
- If typing: create bullet list of questions
- Write summary in bottom section
- Tag the page with relevant keywords
OneNote-Specific Features
Audio Recording:
- Click Insert → Record Audio during lecture
- Notes get time-stamped
- Click on any note to hear what was said at that moment
- Perfect for reviewing difficult concepts
Ink to Text:
- Handwrite your notes
- Select text → Draw → Ink to Text
- Convert handwriting to typed text
- Makes notes searchable
Math Equations:
- Draw → Math
- Handwrite equations
- OneNote converts to formatted math
- Can solve equations step-by-step
Search:
- OneNote searches typed AND handwritten text
- Search across all notebooks
- Find notes by keyword instantly
Tutorial 3: Cornell Notes in GoodNotes (iPad)
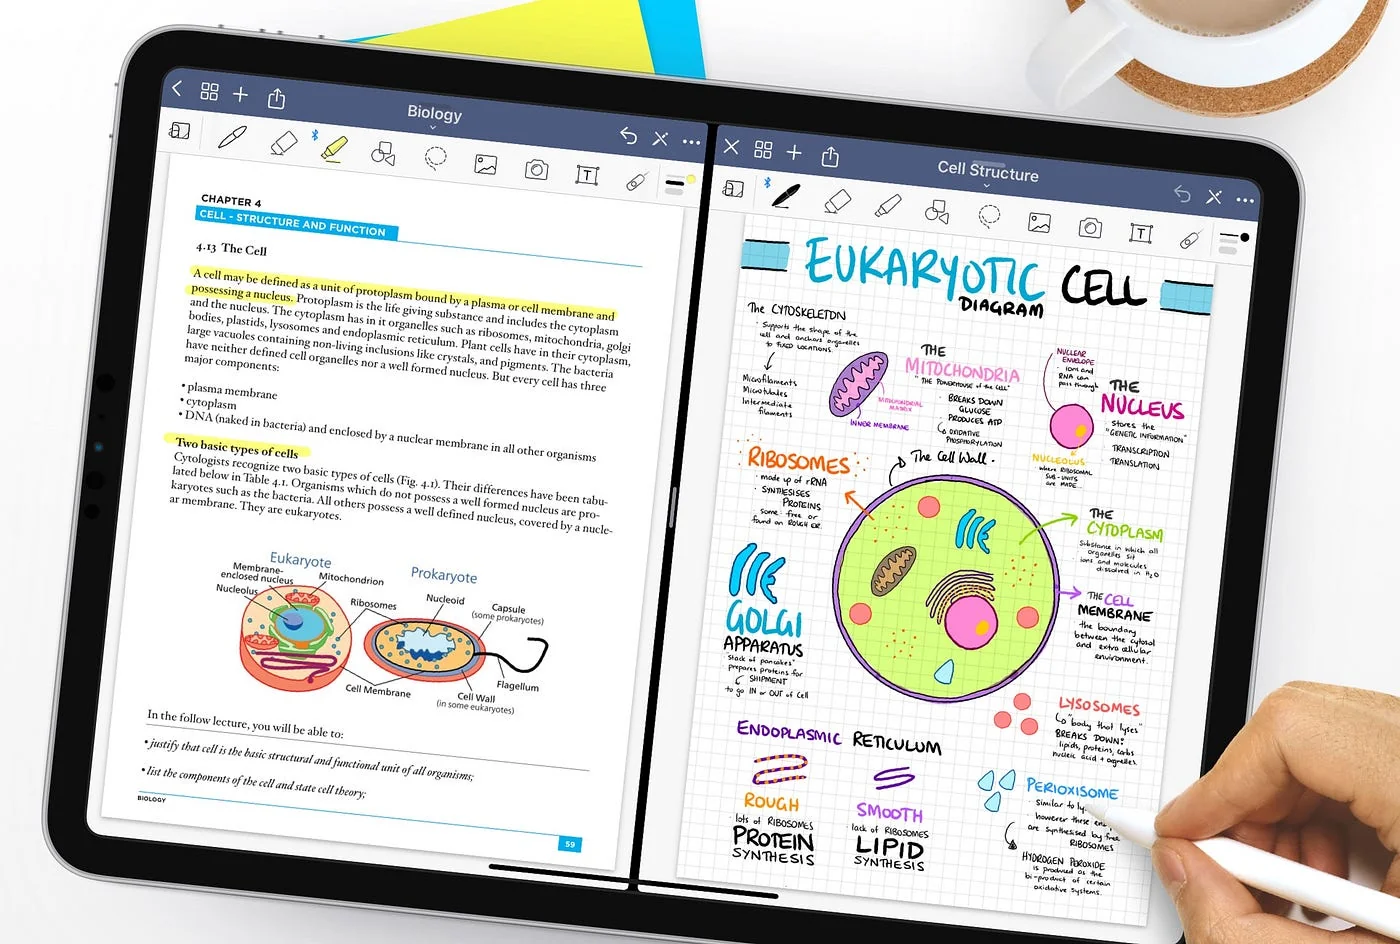
Difficulty: Beginner Time to Setup: 5 minutes Best For: iPad users with Apple Pencil who prefer handwriting
Step 1: Get Cornell Template
Option A: Use Built-In Templates
- Open GoodNotes
- Create new notebook
- Select template
- Look for "Cornell" in template gallery
- Choose your preferred ruling style
Option B: Import Custom PDF Template
- Download Cornell PDF template (from our templates page)
- Open in GoodNotes (Share → Open in GoodNotes)
- Create new notebook with this template
Step 2: Organize Your Notebooks
- Create notebooks by subject:
- "Biology Cornell Notes"
- "History Cornell Notes"
- etc.
- Use folders to group related subjects
- Color-code notebooks for quick identification
Step 3: Taking Handwritten Cornell Notes
During Lecture:
- Open notebook to new page
- Write topic and date at top
- Use Apple Pencil in Notes column (right side)
- Handwriting tips:
- Use zoom box for small writing
- Switch pen colors for different concepts
- Use highlighter for emphasis
- Draw diagrams and charts directly
- Leave cue column blank during lecture
After Lecture:
- Reopen the notes
- Write questions in cue column (left side)
- Write summary at bottom
- Optional: Convert handwriting to text for searchability
Step 4: Review Process in GoodNotes
Self-Testing Method:
- Use lasso tool to select notes column
- Move temporarily off-page
- Read cue questions only
- Test yourself on each question
- Move notes back to check answers
Cover Method:
- Use an overlay blank page
- Position over notes column
- Review using cue column only
- Flip or move overlay to check answers
GoodNotes Features for Cornell Notes
Favorites:
- Star important pages
- Quick access from favorites tab
- Perfect for pages to review before exams
Outline View:
- Automatically detects headings
- Navigate long notes quickly
- Jump to specific topics instantly
OCR Search:
- Search handwritten text
- Find notes even in handwriting
- Works surprisingly well
Export Options:
- Export as PDF (preserves handwriting)
- Export as image
- Share via email or AirDrop
- Print physical copies
Tutorial 4: Cornell Notes in Google Docs
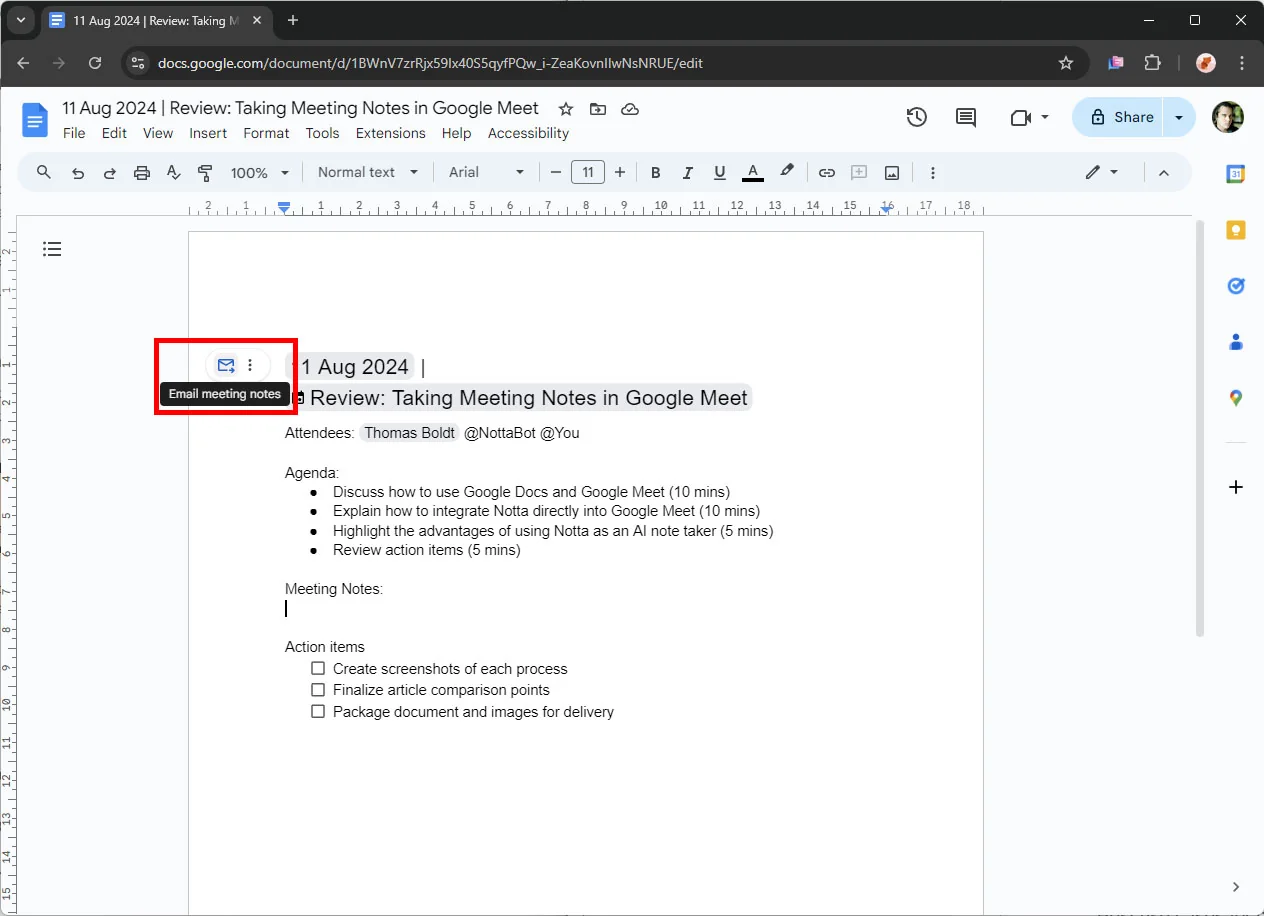
Difficulty: Beginner Time to Setup: 5 minutes Best For: Collaboration and free cross-platform access
Step 1: Create Cornell Template
- Open Google Docs
- Insert → Table → 2x2
- Modify table:
- Select right column → Right-click → Merge cells
- Select bottom row → Right-click → Merge cells
- Adjust column widths:
- Hover over column divider
- Drag to approximately 30/70 ratio
- Add headers:
- Top cells: "Cues" and "Notes"
- Bottom cell: "Summary"
Step 2: Format Template
-
Select top row → Right-click → Table properties
-
Set minimum row height: 5 inches
-
Set cell padding: 0.1 inches
-
Add border styling if desired
-
Add document header:
Subject: ___________  Date: __________
Topic: _____________________________
Step 3: Save as Reusable Template
Method 1: Template Folder
- Save document: "Cornell Notes Template"
- Create folder: "Templates"
- When needed: Make a copy, rename, use
Method 2: Google Drive Template Gallery (if available)
- File → Save as Template
- Name: "Cornell Notes"
- Access from Template Gallery
Step 4: Taking Notes in Google Docs
During Lecture:
- Make copy of template
- Rename with topic and date
- Click in Notes cell (right side)
- Type notes directly
- Use formatting:
- Ctrl/Cmd + B for bold
- Ctrl/Cmd + I for italics
- Bulleted lists for clarity
Collaboration Features:
- Share with classmates → Can view or edit
- Use Comments → @mention to ask questions
- Suggesting mode → Propose edits
- Version history → See all changes
After Lecture:
- Add cue questions in left cell
- Write summary in bottom cell
- Add comments for clarification needed
- Share with study group
Google Docs Tips
Voice Typing:
- Tools → Voice typing
- Speak your notes (great for reviewing while walking)
- Punctuation: say "comma", "period", "new line"
Quick Access:
- Create folder structure by semester/subject
- Star frequently accessed notes
- Use Search to find notes by keyword
Add-ons:
- Explore add-ons for enhanced functionality
- Some add Cornell-specific features
Tutorial 5: Cornell Notes with KenzNote (Automatic)
Difficulty: Easiest Time to Setup: 2 minutes Best For: Meetings, lectures, interviews - any recorded audio
How It Works
KenzNote uses AI to automatically transcribe and format audio into Cornell note structure.
The Process:
- Record or upload audio (meeting, lecture, interview)
- KenzNote transcribes with speaker identification
- AI extracts key points into Notes column
- AI generates questions for Cue column
- AI creates summary
- You review and edit as needed
Step 1: Set Up KenzNote
- Sign up at kenz-note.com
- Connect integrations:
- Zoom, Google Meet, Microsoft Teams
- Or use mobile app to record directly
- Configure preferences:
- Cornell format (vs other note styles)
- Auto-send to email
- Integration with other apps
Step 2: Record a Meeting/Lecture
Option A: Direct Recording
- Open KenzNote app
- Hit "Record"
- Place device near speaker(s)
- Stop when finished
Option B: Zoom/Meet Integration
- Start your Zoom/Meet call
- KenzNote bot joins automatically
- Records and transcribes in background
- You focus on listening and participating
Option C: Upload Existing Recording
- Have audio/video file
- Upload to KenzNote
- Processing happens automatically
Step 3: Review Your Auto-Generated Cornell Notes
What You'll Receive:
- Full transcript with timestamps
- Notes column: Main discussion points
- Cue column: Auto-generated questions
- Summary: Key takeaways
Edit and Refine:
- Read through AI-generated notes
- Add additional cue questions
- Refine summary in your own words
- Highlight action items
- Add your personal insights
Step 4: Export and Integrate
Export options:
- PDF (Cornell formatted)
- Word document
- Plain text
- Email to yourself/team
Integrations:
- Send to Notion
- Export to Google Docs
- Add to OneNote
- Sync with your note-taking system
Best Use Cases
Professional Meetings:
- Focus on discussion, not note-taking
- Capture action items automatically
- Share notes with team instantly
Online Lectures:
- Record entire lecture
- Get searchable transcript
- Review AI-generated study questions
Interviews:
- Focus on conversation
- Perfect transcription for review
- Highlight key quotes automatically
Digital Cornell Notes Best Practices
1. Master Your Chosen Platform
Don't app-hop. Pick one platform and learn it thoroughly:
- Master keyboard shortcuts
- Understand organization features
- Optimize your workflow
- Commit for at least one semester
2. Maintain Consistent Organization
Folder/Notebook Structure:
📁 Semester Fall 2026
  📁 BIOLOGY 101
    📄 2026-09-01-Cell Structure
    📄 2026-09-03-Cell Division
    📄 2026-09-08-Cellular Respiration
  📁 HISTORY 202
    📄 2026-09-02-WWI Causes
    📄 2026-09-05-WWI Major Battles
Naming Convention:
YYYY-MM-DD-Topic-Name
Benefits:
- Automatic chronological sorting
- Easy to find specific date
- Clear topic identification
3. Use Tags and Metadata
Effective tagging:
- Subject tags: #biology #history
- Type tags: #lecture #reading #review
- Status tags: #to-review #mastered #exam-prep
- Concept tags: #mitochondria #evolution
4. Minimize Distractions
Digital focus techniques:
- Turn off notifications during lectures
- Close unnecessary apps
- Use focus mode if your device has it
- Full-screen your note app
- Block distracting websites during study time
Apps to help:
- Freedom
- Cold Turkey
- Forest
- Focus modes (iOS/Android)
5. Backup Regularly
Protect your work:
- Enable automatic cloud sync
- Export important notes to PDF quarterly
- Use version control (Git) for plain text notes
- Keep local copies of critical notes
6. Integrate Multimedia Strategically
Useful multimedia:
- ✅ Diagrams and charts from slides
- ✅ Screenshots of key concepts
- ✅ Audio snippets of complex explanations
- ✅ Links to related resources
Avoid:
- ❌ Copying entire slide decks (use links instead)
- ❌ Videos that slow down app performance
- ❌ Dozens of images per note (slows loading)
7. Sync Across Devices
Multi-device workflow:
- Laptop: Primary note-taking during class
- iPad: Handwritten diagrams and review
- Phone: Quick review during commute
- Web: Access from any computer
Ensure your chosen platform syncs seamlessly.
8. Regular Review Schedule
Digital advantage: Set up automatic reminders
Review cadence:
- Day 1: Same day as lecture (add cues + summary)
- Day 3: First review (test with cue column)
- Week 1: Second review
- Week 2: Third review
- Before exam: Final review
Use calendar reminders or spaced repetition apps to schedule reviews.
9. Use Search Functionality
Search strategies:
- Search by keyword across all notes
- Filter by date range
- Filter by tags or subject
- Save common searches for quick access
Example searches:
- "mitochondria" → Find all mentions
- "exam-prep" tag → All notes to review
- Date range "Sept 2026" → First month's notes
10. Export for Exam Prep
Create study materials:
- Export all cue columns → Flashcard deck
- Compile all summaries → Study guide
- Print key pages → Physical review
- Share with study group → Collaborative prep
Troubleshooting Common Issues
Problem: Typing is slower than handwriting for me
Solutions:
- Practice touch typing → Invest in improvement
- Use hybrid approach → Handwrite iPad, transcribe later
- Voice dictation → Speak notes (with editing after)
- Abbreviations system → Speed up typing significantly
Problem: I get distracted by other apps
Solutions:
- Single-tasking mode → Full-screen note app only
- Separate devices → Notes on iPad, laptop closed
- Website blockers → Block social media during class
- Accountability → Study group check-ins
Problem: My device runs out of battery
Solutions:
- Charge before class → Start at 100%
- Bring charger → Sit near outlet
- Battery case → Extend iPad/phone life
- Power bank → Portable charging
- Backup method → Paper notebook for emergencies
Problem: App crashes or lags
Solutions:
- Close other apps → Free up memory
- Update software → Install latest version
- Restart device → Clear temporary issues
- Lighter template → Remove heavy media
- Switch apps → If persistent, try alternative
Problem: Can't find notes later
Solutions:
- Consistent naming → YYYY-MM-DD format
- Tag everything → Multiple tags per note
- Folder structure → Logical organization
- Weekly review → Stay familiar with content
- Master search → Learn your app's search syntax
Problem: Notes don't sync across devices
Solutions:
- Check internet → Both devices need connection
- Force sync → Manual sync option
- Sign out/in → Refresh account connection
- Update app → Latest version on all devices
- Contact support → If persistent issue
Platform Comparison Summary
| Platform | Setup Time | Difficulty | Best Feature | Limitation |
|---|---|---|---|---|
| Notion | 15 min | Medium | Flexibility & organization | Learning curve |
| OneNote | 10 min | Easy | Free & handwriting support | Can feel cluttered |
| GoodNotes | 5 min | Easy | Best handwriting experience | Apple only, paid |
| Google Docs | 5 min | Easy | Collaboration & free | Basic features |
| KenzNote | 2 min | Very Easy | Automatic from audio | Subscription required |
| Obsidian | 20 min | Hard | Local files & linking | Technical setup |
| RemNote | 15 min | Medium | Built-in spaced repetition | Learning curve |
Conclusion
Taking Cornell notes digitally combines the proven learning benefits of the Cornell Method with the advantages of digital tools: searchability, sync, multimedia, and organization.
Key Takeaways:
- Choose one platform that matches your devices and preferences
- Set up a template once, use it repeatedly
- Focus on the Cornell process, not the technology
- Maintain discipline against digital distractions
- Review regularly using the cue column for self-testing
- Backup your notes to protect your work
- Integrate multimedia strategically, not excessively
The best digital Cornell system is:
- One you understand fully
- One you'll use consistently
- One that syncs to your devices
- One that fits your workflow
Start today with whichever platform you already have. Perfect your process over time. The Cornell Method's power comes from consistent application, not from using the fanciest tool.
Remember: Notes are worthless if you don't review them. Set up your digital system, but more importantly, schedule your review sessions and stick to them.
Take action: Pick your platform, set up a Cornell template today, and take your first digital Cornell notes in your next lecture or meeting.
Ready to skip the setup entirely? Try KenzNote for AI-powered transcription that automatically formats your meetings and lectures into Cornell notes.
Frequently Asked Questions
What is the best app for digital Cornell notes?
It depends on your needs. Notion offers the most flexibility with customizable templates and databases. GoodNotes is best for handwritten notes on iPad with Apple Pencil. OneNote is the best free option with cross-platform sync and handwriting support. For automatic Cornell notes from audio, KenzNote uses AI to transcribe and format notes without manual setup.
Can I take Cornell notes on an iPad?
Yes. GoodNotes and Notability are excellent for handwritten Cornell notes with Apple Pencil. You can use built-in Cornell templates or import custom PDF templates. OneNote also works well on iPad with both typing and handwriting support. The iPad's portability and stylus input make it one of the best devices for digital Cornell notes.
Is it better to type or handwrite digital Cornell notes?
Research shows handwriting leads to better conceptual understanding because it forces selective processing rather than verbatim transcription, and that handwriting activates broader brain connectivity patterns linked to memory formation. However, typing is faster and produces searchable, editable notes. A hybrid approach works well: type during fast-paced lectures for speed, handwrite for subjects requiring diagrams or equations. The best method is whichever one you'll use consistently.
How do I set up a Cornell notes template in Notion?
Create a database with properties for Subject, Date, Tags, and Status. For each note, use a 2-column layout (30/70 ratio) with the cue column on the left and notes column on the right. Add a callout block below for the summary section. Save this as a database template so you can reuse it with one click for every new note.
Do digital Cornell notes work for meetings, not just school?
Absolutely. The Cornell format works excellently for professional meetings. Use the notes column for discussion points and decisions, the cue column for action items and follow-up questions, and the summary section for key takeaways. Tools like KenzNote can automatically generate Cornell-formatted notes from meeting recordings.
How do I review digital Cornell notes effectively?
Cover or hide the notes column and test yourself using only the cue questions on the left. In apps like Notion, use toggle lists that hide answers until you click. In GoodNotes, use the lasso tool to temporarily move the notes column off-screen. Follow a spaced repetition schedule: review on day 1, day 3, week 1, week 2, and before exams.
Can I share digital Cornell notes with classmates?
Yes, and this is a major advantage of digital notes. Google Docs and Notion offer real-time collaboration. OneNote allows shared notebooks. GoodNotes can export as PDF for sharing. You can create study groups where each person takes Cornell notes for different lectures and shares them with the group.
What if my device runs out of battery during a lecture?
Always start lectures with a full charge and bring a charger or power bank. Sit near outlets when possible. Keep a backup paper notebook for emergencies. Most importantly, enable cloud sync so your notes are saved continuously — even if your device dies mid-lecture, everything typed up to that point is preserved.
Related Resources
- Free Cornell Note Templates - Download templates for all major platforms
- 15 Best Apps for Cornell Notes Compared - Detailed app comparison guide
- Cornell Method Notes: Complete Guide - Learn the Cornell Method from scratch
- Best Note-Taker Apps for Students - Broader guide to student note-taking apps
- Getting Started with KenzNote - AI-powered automatic Cornell notes
References & Citations
- [1]Handwriting but not typewriting leads to widespread brain connectivity: a high-density EEG study with implications for the classroomFrontiers in Psychology. January 26, 2024https://www.frontiersin.org/journals/psychology/articles/10.3389/fpsyg.2023.1219945/full
- [2]The Cornell Note Taking SystemCornell University Learning Strategies Center. January 1, 2024https://lsc.cornell.edu/how-to-study/taking-notes/cornell-note-taking-system/
- [3]Cornell note-taking strategy instruction for Gen Z: enhancing EFL students reading comprehensionAsian-Pacific Journal of Second and Foreign Language Education, Springer Nature. January 1, 2025https://link.springer.com/article/10.1186/s40862-025-00347-8
All external sources have been reviewed for accuracy and relevance. Last verified: October 2026.

About KenzNote Team
The KenzNote team is dedicated to helping teams capture better meeting insights and transform how they collaborate. With backgrounds in AI, product design, and enterprise software, we're building the future of meeting productivity.
Ready to transform your meetings?
KenzNote automatically captures meeting insights, extracts action items, and generates summaries so you can focus on the conversation instead of taking notes.
Try KenzNote Free